In-App Billing Example for App Inventor 2 (AI2)
Updated on / dernière mise à jour : 12/09/2023
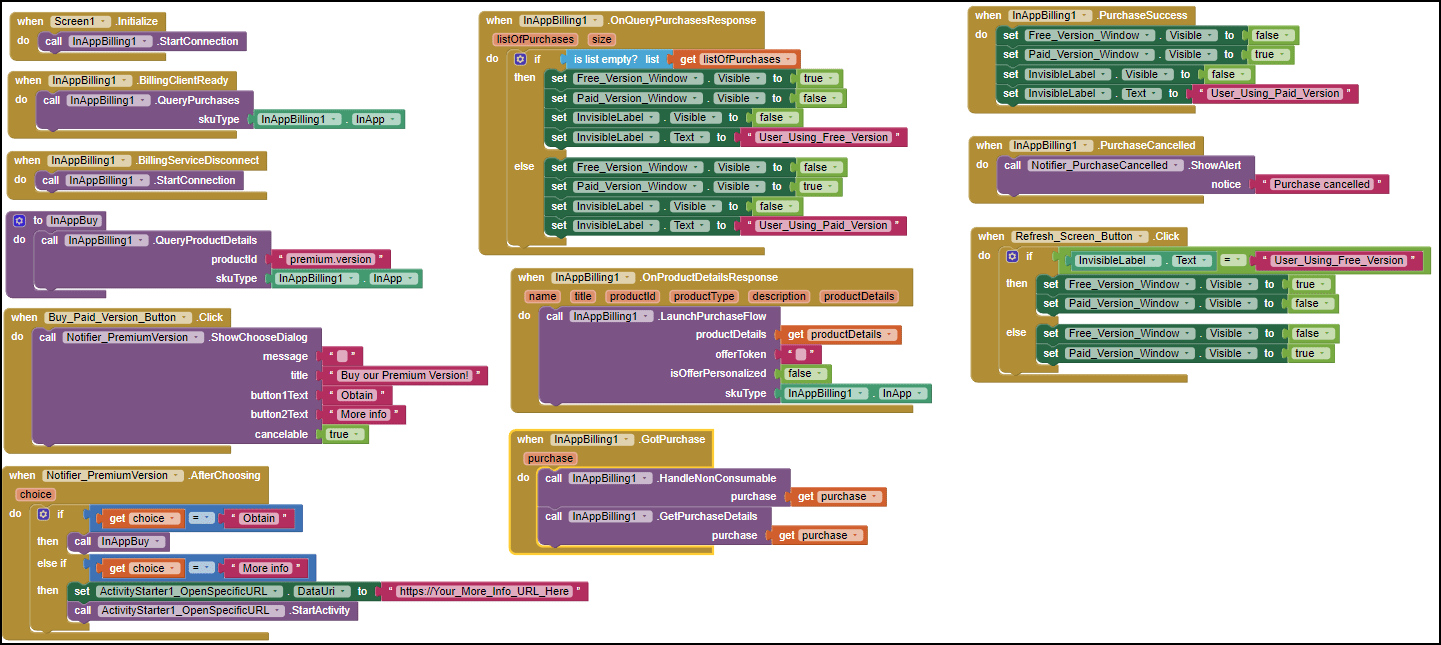
Free and paid extensions allow App Inventor 2 (AI2) users to implement in-app billing in their app creations. The one I am using for this example is Oseamiya's free extension available here. You must upload this extension to your AI2 project to have access to the following required blocks.
Here's the example:
And a few caveats:
- I am using a productId called "premium.version". The name you shall use for your own productId must respect a few conditions specified by Google. In the Google Play Console, click on your specific app project (must have been uploaded to the console first) then click on "In-app products" under the Monetize section which appears on the left side of the screen. This is where you'll be able to create your new in-app product for your app: you will be able to give it a name, a price and a product ID (use the same as in your AI2 project). If you are not using the same product ID then it will not work since Google won't be able to connect to your app.
- My example is only for an in-app product that would be non renewable. Hence, this is not an example of an in-app subscription. If you are offering a free app on Google Play which integrates a button or a link to access Premium content, then this basic example could be a good starting point.
- The InvisibleLabel offers two possibilities: "User_Using_Free_Version" and "User_Using_Paid_Version". This is a practical way for the app to detect if the user is using a paid version or the free one (once the app is closed and opened later on). It also works well if you include a refresh button to your app. Again, this is just an example of how you could set up your blocks to make it work properly.
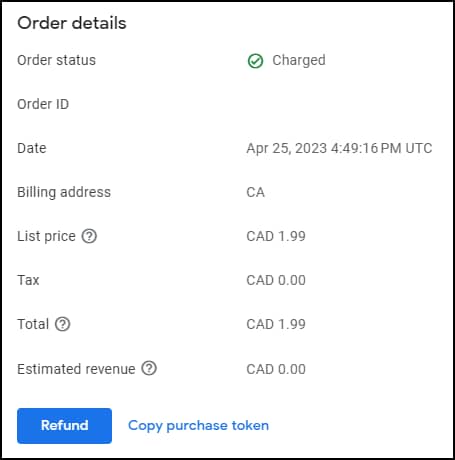
Google Play Console makes it possible to test in-app billing and you can learn more about it on this webpage. If you already tested your app once (which activated your premium version), you may want to undo this activation in order to redo tests a few more times. If so, open the Google Play Console, click on "Order Management"on the left-side menu and select your order – the one used for your previous test – by clicking on the blue arrow located on the right side of the proper order. Your Order details will appear and you'll then be able to click on the "Refund" button.
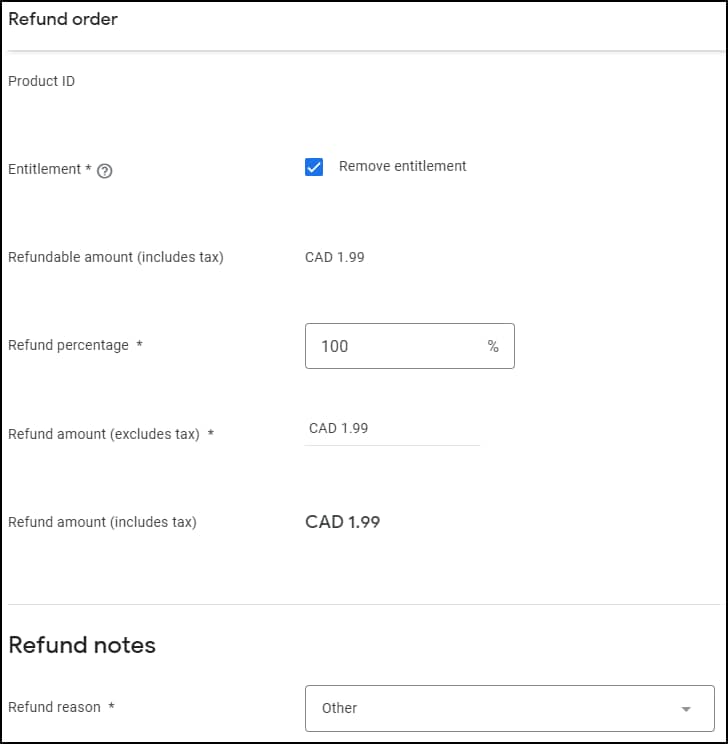
Under the Refund order screen, make sure to check the "Remove entitlement" box. If you don't, when you open your app for testing, you'll keep seeing your premium version; when this box is checked then Google Play deletes data related to your premium version's previous activation and you'll then be able to redo your test within your app. Under the "Refund notes" section, I usually select "Other" and mention "Testing" as a comment.
I hope this example can be useful. By downloading my Imperial / Metric Converter app on Google Play, you will see how my implementation of this example works out. Feel free to purchase the premium version of the app :).
Have fun!
Robert
Related articles
How to Insert AdMob Ads to an App Inventor 2 (AI2) App
How to Modify and Sign App Bundle (.aab) Files
How to overcome MIT App inventor's 5 meg limit for your apk files?


